
We all know how important clean drinking water is for a healthy life. But have you ever thought about the tank that stores your water? Is it actually clean? Most people invest in water filters and RO systems but completely ignore the tank itself. If you are one of them, this guide is exactly what you need.
Cleaning Xperts brings you a simple, step-by-step guide on how to clean water tank at home — without any expensive equipment or professional help.
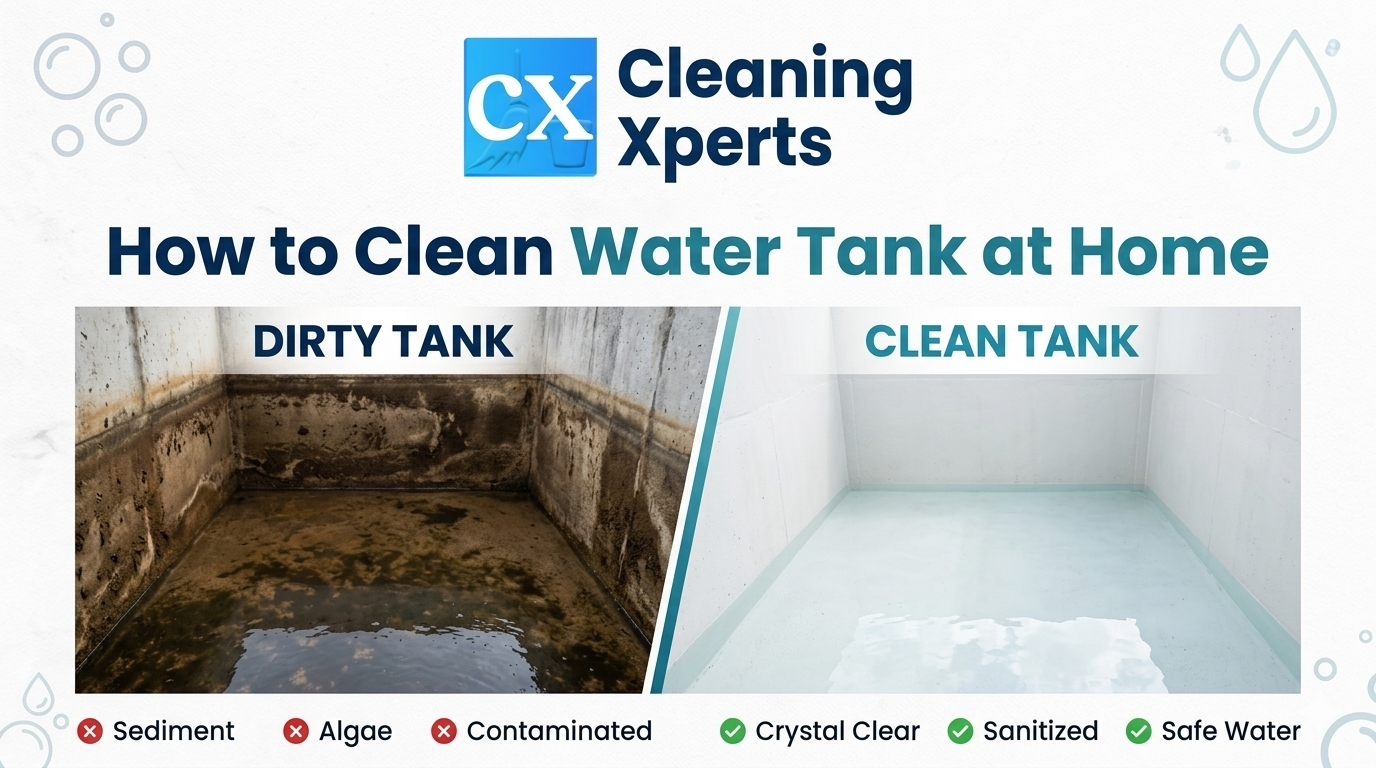
Why Cleaning Your Water Tank is Important
Your water tank stores hundreds of litres of water every single day. Over time, dust, sediment, algae, and harmful bacteria build up inside the tank walls and floor. Even if your water supply is clean, a dirty tank can contaminate it before it reaches your tap.
Here are some warning signs that your tank needs immediate cleaning:
- Water looks yellowish or brownish
- Bad smell or unusual taste in water
- Green or black algae visible inside the tank
- Family members frequently falling sick with stomach infections
- Slippery or slimy surface inside the tank
If you notice any of these signs, do not wait — it is time to act.
How Often Should You Clean Your Water Tank?
Health experts and municipal guidelines recommend cleaning your water tank at least once every 6 months. If you live in a dusty area or your water supply quality is poor, cleaning every 3 months is ideal.
Mark a reminder on your calendar right now — because most people forget and end up drinking contaminated water for years without realising it.
How to Clean Water Tank at Home — Step-by-Step Process
Cleaning Xperts has designed this simple process that any homeowner can follow safely at home.
Step 1 — Gather Your Supplies
Before you begin, collect the following items:
- Long-handle scrubbing brush
- Bleaching powder or chlorine tablets
- Rubber gloves and face mask
- Plastic bucket and mug
- Torch or flashlight (for underground tanks)
- Water pump or pipe to drain the tank
All of these are easily available at any hardware store or online for around ₹200–₹400. No special equipment needed.
Step 2 — Drain the Tank Completely
Turn off the water supply and drain all the water from the tank. For overhead tanks, use the outlet pipe to drain it downward. For underground sumps, use a submersible pump or manual pump.
Important tip: Do this early in the morning so the tank has the full day to be refilled before night.
Leave a small amount of water at the bottom — it makes scrubbing easier and helps loosen the sediment.
Step 3 — Scrub the Inside Walls and Floor
This is the most important step. Use your long-handle brush to scrub the inner walls, floor, corners, and ceiling of the tank thoroughly.
- Pay extra attention to green or black patches of algae
- Clean the corners and cracks carefully — bacteria loves to hide there
- Remove any heavy sediment or sludge settled at the bottom using a bucket
The tanki saaf karne wala (tank cleaning) process is most effective when mechanical scrubbing is done properly. About 70% of dirt and contamination is removed through scrubbing alone — chemicals alone are not enough.
Step 4 — Disinfect the Tank with Chlorine Solution
After scrubbing, prepare a chlorine disinfectant solution:
- For a 1000-litre tank — mix 2 tablespoons of bleaching powder in 1 litre of water
- Apply this solution evenly on all inner surfaces of the tank
- Let it sit for 30 to 45 minutes
- Rinse thoroughly with clean water 2 to 3 times
This step kills all remaining bacteria, viruses, and algae. It is a WHO-approved method and completely safe for drinking water tanks.
Step 5 — Final Rinse and Refill
After disinfection, rinse the tank 2 to 3 times with clean water to remove all traces of chlorine and loosened dirt. Once satisfied, close the tank properly, refill it, and your water is safe to use again.
Cleaning Xperts always recommends doing a quick smell test after refilling — if the water smells fresh and clean, the job is done right.
Clean Water Tank at Home — Common Mistakes to Avoid
Based on experience, Cleaning Xperts technicians have found that homeowners often make these mistakes:
Skipping the scrubbing step — Many people simply pour chlorine into the tank and think it is cleaned. That is not correct. Always scrub first, then disinfect.
Cleaning only the outside — A shiny tank from the outside can be dangerously dirty on the inside.
Refilling too quickly — Always wait at least 30 to 45 minutes after applying disinfectant before rinsing and refilling.
Cleaning only once a year — This is the most common mistake. A tank should be cleaned every 6 months without fail.
Not checking for cracks — While cleaning, always inspect the tank for cracks or leaks. A cracked tank allows contamination to enter from outside.
Overhead Tank vs Underground Tank — What is the Difference?
| Overhead Tank | Underground Sump | |
|---|---|---|
| Cleaning Frequency | Every 6 months | Every 3 to 4 months |
| Difficulty Level | Easy | Moderate |
| Can You DIY? | Yes | Yes, but professional is safer |
| Special Check | Inspect for cracks | Check for mosquito larvae |
Underground tanks tend to collect more sediment and are more prone to mosquito breeding. The tanki saaf karne wala process for underground tanks is slightly more complex and it is always safer to hire a professional for large underground sumps.
When Should You Call a Professional?
Sometimes DIY cleaning is not enough — or simply not safe. Contact Cleaning Xperts if:
- Your tank is very large — 5000 litres or more
- You need to physically enter an underground sump
- There is heavy algae or fungal growth inside
- You want post-cleaning water quality testing
- You do not have the time or the right equipment
Cleaning Xperts is a certified team of water tank cleaning specialists. We use eco-friendly, food-grade disinfectants and provide a water quality check after every service. We are currently serving Delhi, Noida, Gurgaon, Mumbai, Pune, Hyderabad, and all major Indian cities.
How to Clean Water Tank at Home — Quick Checklist
Save this checklist for your next cleaning day:
- ✅ Wear rubber gloves and face mask
- ✅ Drain all water from the tank
- ✅ Scrub inner walls, floor, and corners thoroughly
- ✅ Apply chlorine disinfectant solution
- ✅ Wait 30 to 45 minutes
- ✅ Rinse 2 to 3 times with clean water
- ✅ Refill and seal the tank properly
- ✅ Mark your next cleaning date on the calendar
Final Words from Cleaning Xperts
Clean drinking water does not start at your tap — it starts at your tank. No matter how advanced your water filter is, if your tank is dirty, your water is dirty. It is that simple.
We hope this guide on how to clean water tank at home has helped you understand the process clearly. Follow these steps every 6 months and protect your family from waterborne diseases.
And if you ever need professional help, Cleaning Xperts is just one call away.
📞 Book Your Service Today — Same Day Availability 🌐 cleaningxperts.in | 📍 Serving Across India


